Manage your Account
From the Admin tab in the top ribbon of your window, you can manage user permissions and Apogee Enterprises access. Managing your supplier account enables users within your organization to access to your company’s CSP. In doing so, you can assign certain customers to different users within your organization and authorize access to documents.
Table of contents
How to set or modify Notifications
In the top right of your window, hover over the "Notifications" link to see your unread system notifications. Click "See All Notifications" to view both read and unread notifications.

*NOTE: If you have an SMS-capable device and validate your phone number, you can also choose to receive notifications as short text messages via SMS.
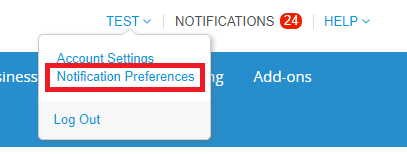
Changing Notification Preferences
Hover over your name in the top right and click "Notification Preferences." You can adjust your notifications under the "Notifications" tab. When you begin your introduction to Coupa, we advise that you enable all your notifications until you are more familiar with the system.
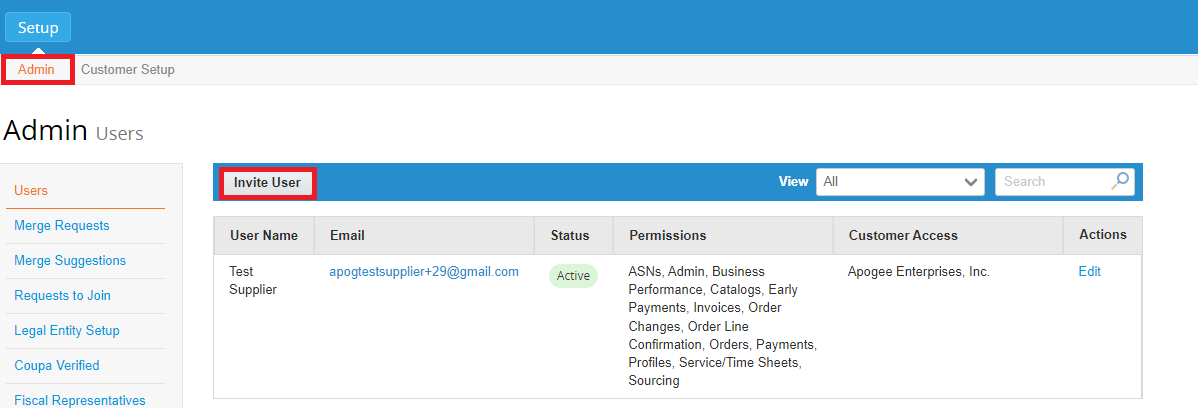
Inviting Users
Inviting Users gives members within your organization access to your CSP. You can add users for specific functions, such as, AR- billing, PO email contact, and EDI/API/Integration contact.
From the "Admin" tab, select Invite User.
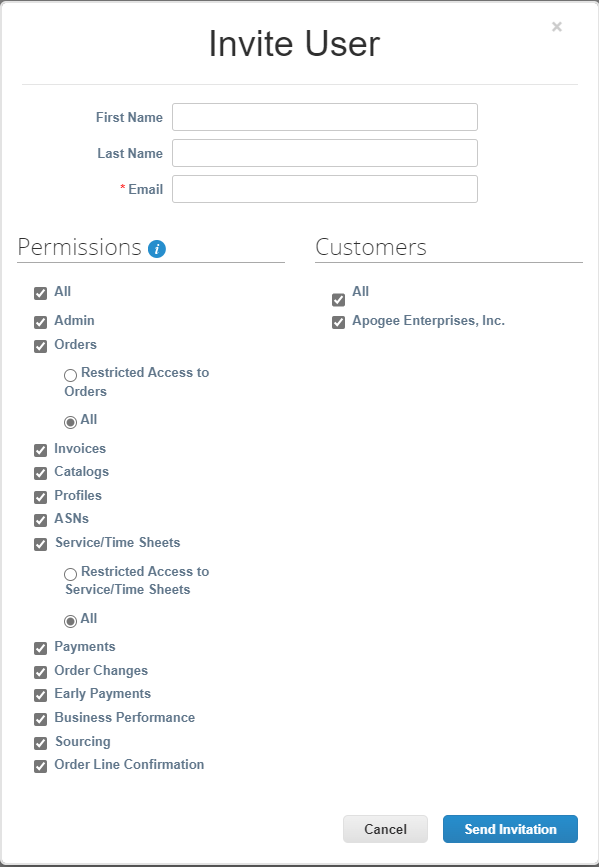
A window will appear that prompts the user to input identifying information for the new user, such as name, email, and permissions.
Coupa does not allow users to be deleted, so you cannot delete a user from your profile. Instead, you can deactivate a user when you no longer want that user to access the account. If you deactivate users, you can always reactivate them later. If you reactivate a user, the customer access is reset for that user, so you will have to reassign customers to that user.
*NOTE: It is recommended to set up at least 2-3 contacts as account admins in the event of absence or departure.
Editing User Access
By editing user access, you can assign different customers to users within your organization.
From the top ribbon, find the "Admin" tab and select Users on the left menu of your screen.
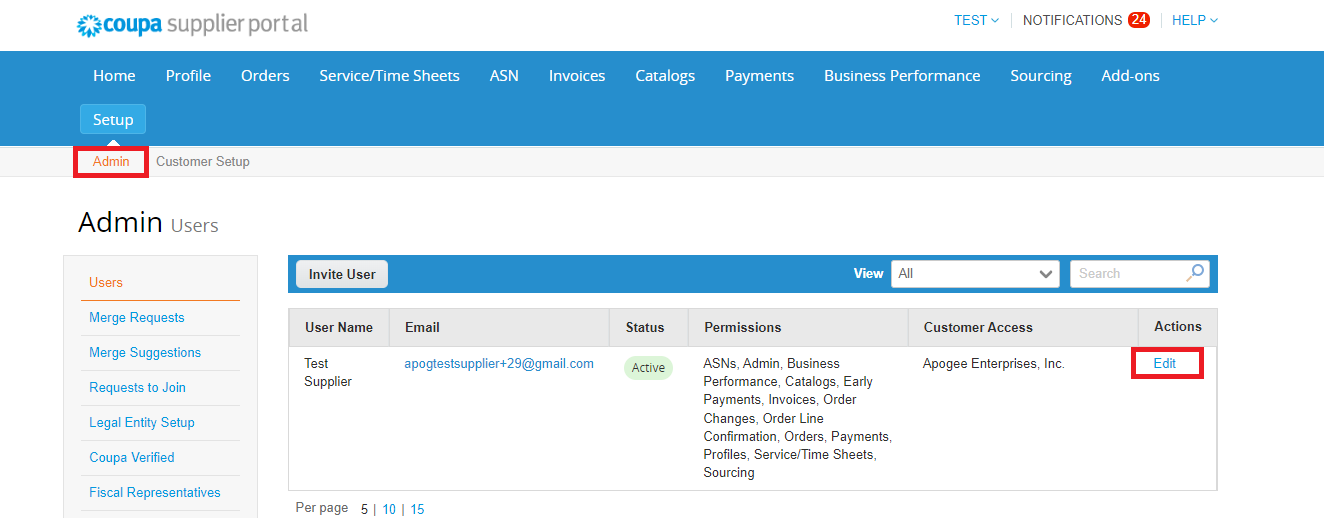
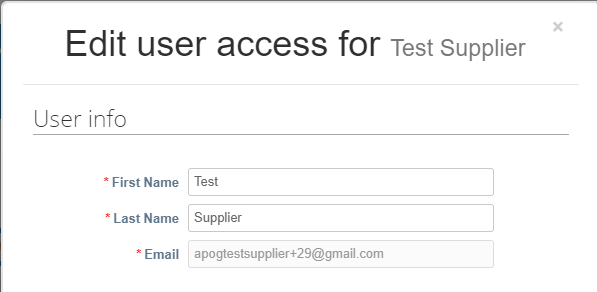
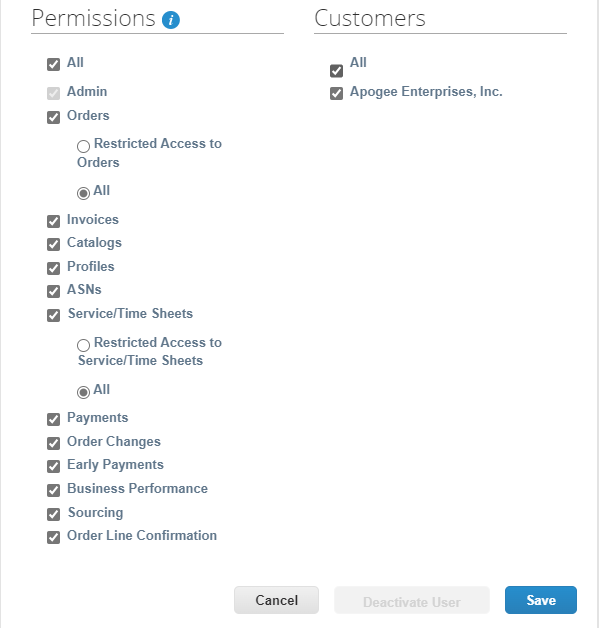
Click Edit to open the "Edit user access for [Username]" window.
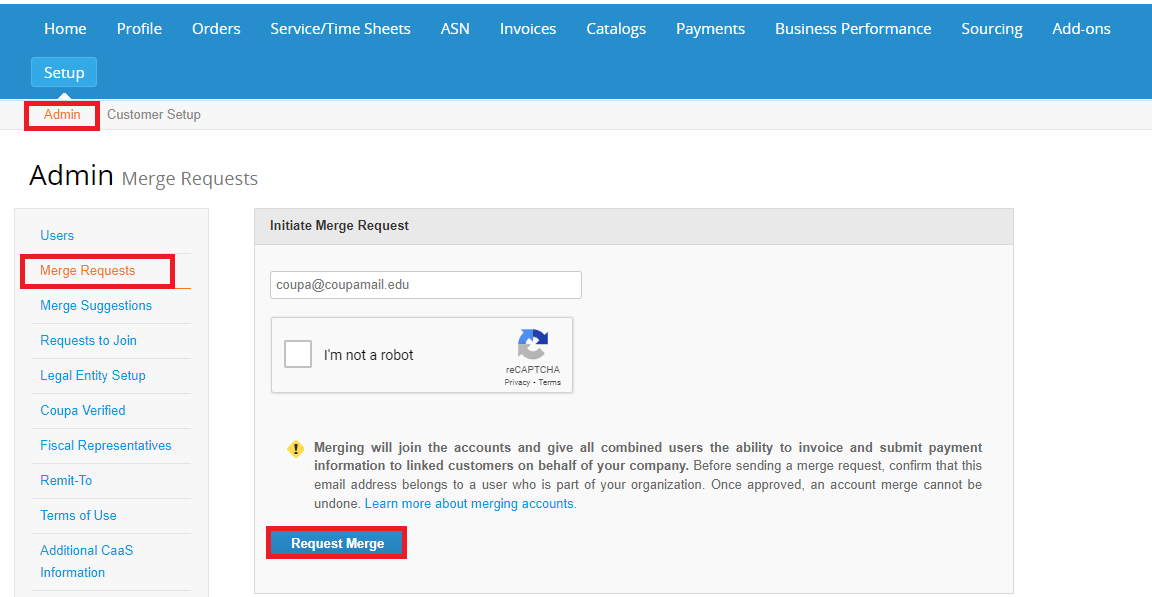
Merging Accounts
If your company has multiple CSP accounts, you can merge the accounts to keep all your customers under one account.
Merge request appears in the left-hand of the "Admin" page.
- - Click Request Merge to merge the accounts
- - Click Remove to remove the request
Create or Update the Supplier Profile
You can update your company’s information to help customers better understand what goods and services you provide.
Select Profile and Edit Profile to update your Supplier Profile.
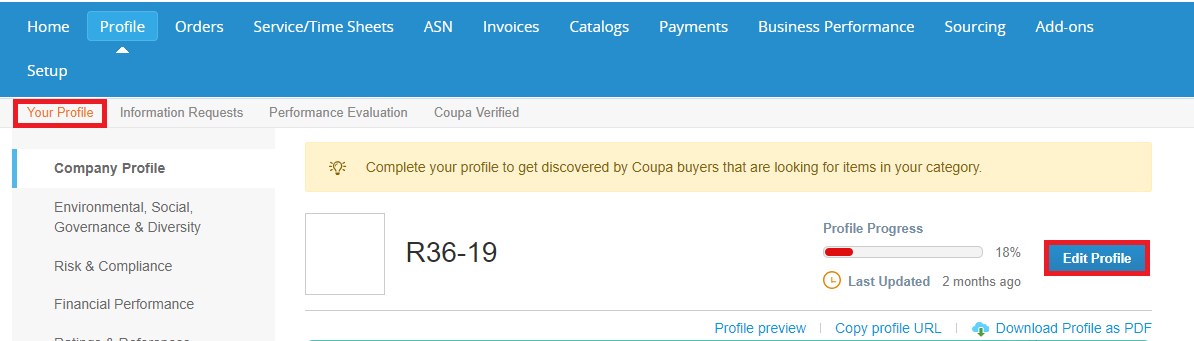
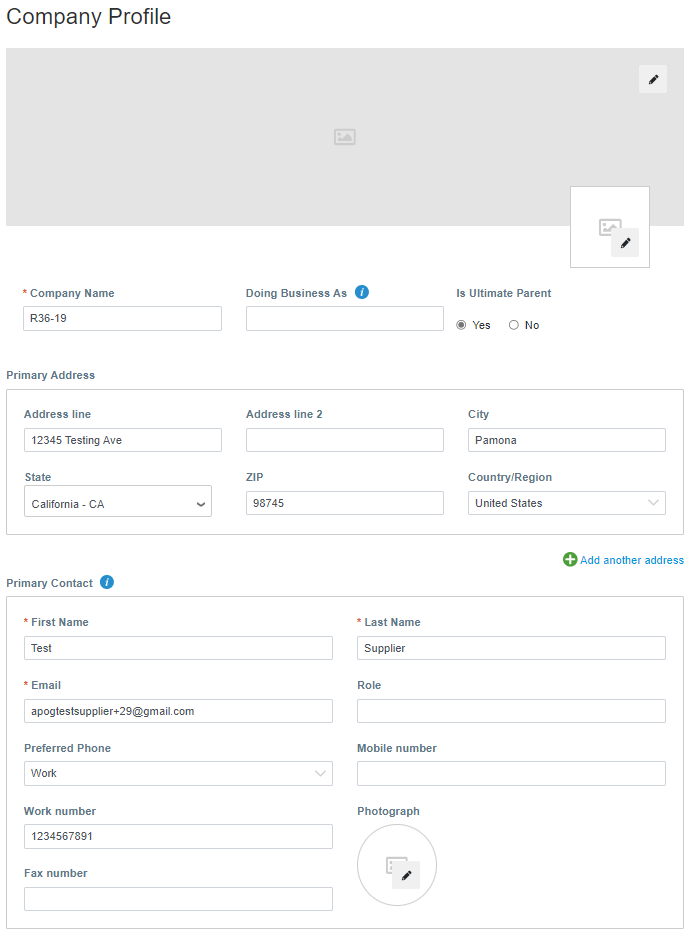
You will use this section to fill out additional company information.
Apogee utilizes SIM (supplier information management) so you will be required to answer specific setup questions to interact with our company.
*When you register or log into the CSP to do business with a customer that uses an onboarding flow, you are guided through the process of providing the customer with the necessary information.
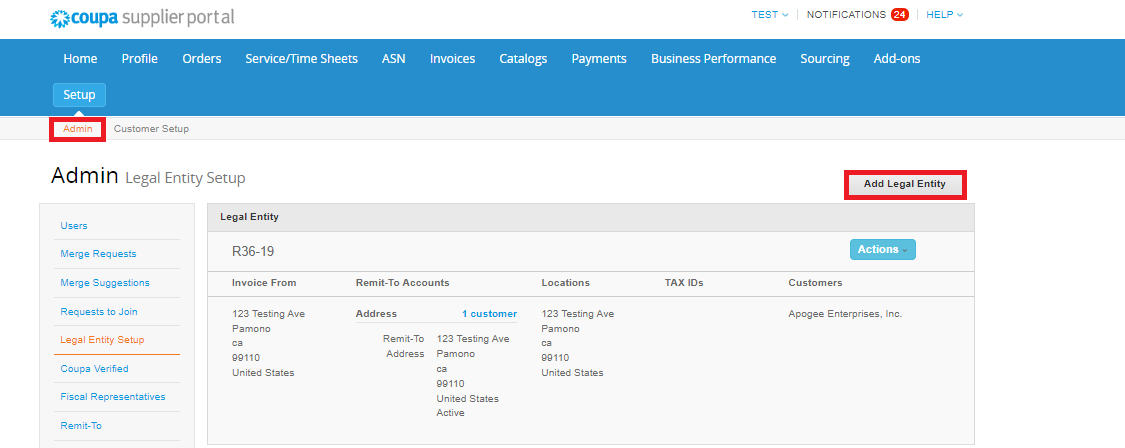
Legal Entity Setup
A legal entity is a representation of your company and gives Coupa customers the information they need to do business with you.
Click the "Admin" tab from the top menu bar and select Legal Entity Setup from the menu on the left.
- - Click Add Legal Entity
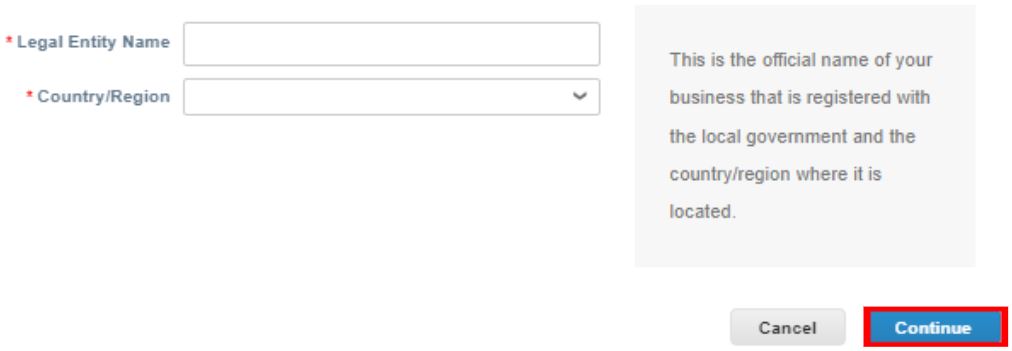
- - Enter your Legal Entity information
- - Click Continue
*NOTE: The information you enter in the CSP is entered separately from the information Apogee requests for the ERP system.
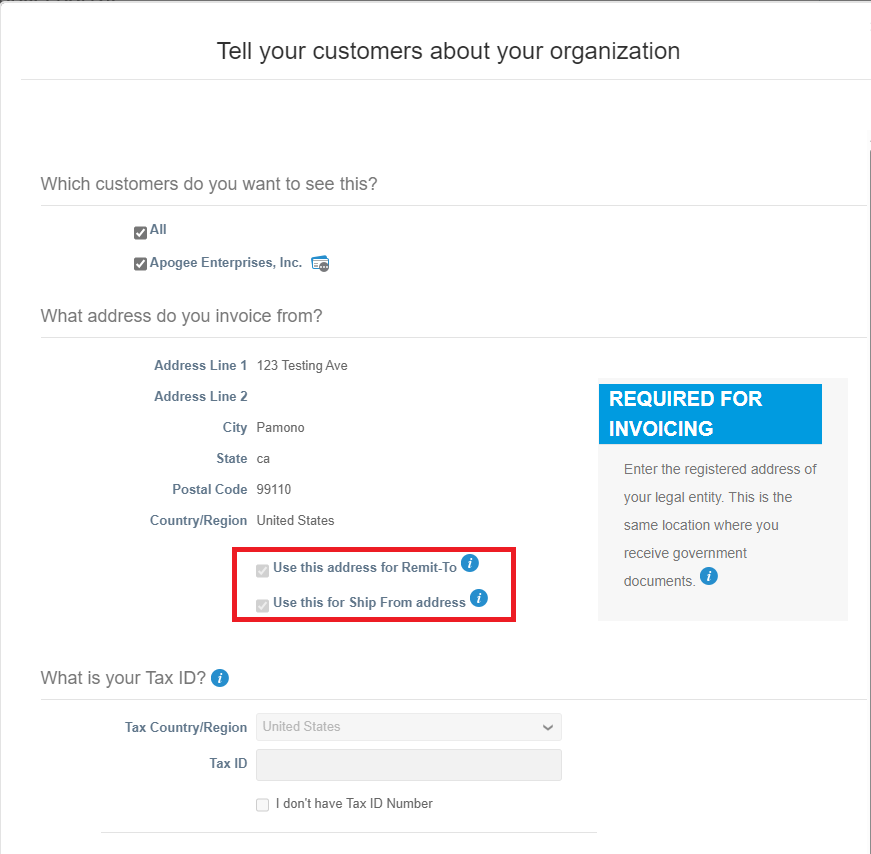
Enabling E-Invoicing
To enable E-Invoicing, you must set up your legal entity, Remit-To, and Ship From information.
- - Complete the invoice address details
- - The "Use this address for Remit-To" and "Use this address from Ship from address" boxes will be auto-checked
- - If either Remit-To or Ship From addresses are different, disable the corresponding checkbox and enter different address details
- - Click Save & Continue when finished
- - Review the information on the next screen and click Done
Please ensure Apogee Enterprises has your current Remit-To Address on file to avoid invoice processing delays in Coupa. This will need to be updated directly with Apogee Enterprises as the system of record is within their ERP.
*Remit-to taxes are based on the address and are processed at the line level.

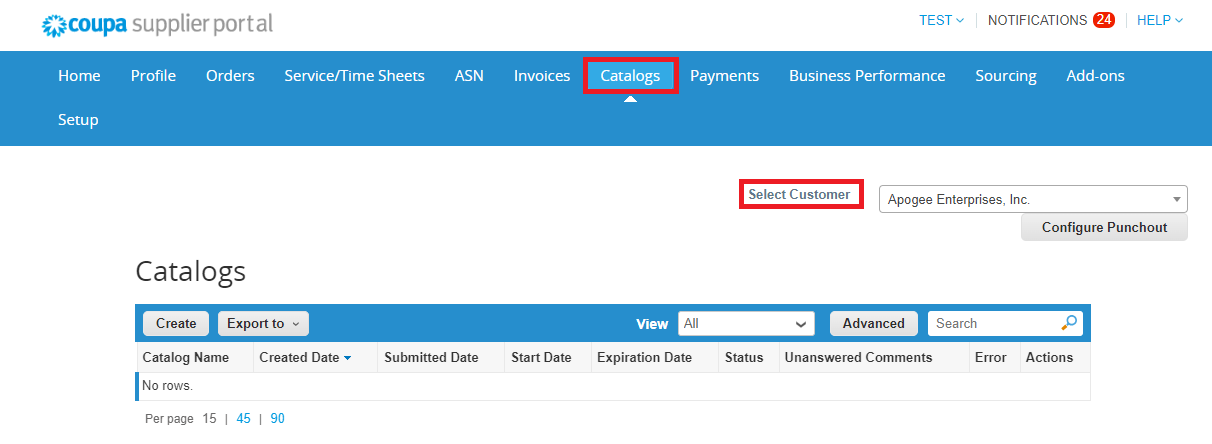
Create or Edit a Catalog
To create a catalog for a customer, go to the "Catalogs" page.
In the Select Customer drop-down, select the desired customer and click Create.
To edit a draft catalog, do one of the following:
- - Click Edit for the catalog in the "Catalogs" table.
- - Click on the Catalog Name link.

On the "Catalog Edit" page, fill in at least the mandatory field (marked with a red asterisk).
You can change the default catalog title ([Your Company Name] Catalog [Number]) in the mandatory "Catalog Name" field.
You can select a start and expiration date for your catalog and a currency to be applied to your catalog items.
*Apogee may have required fields to fill out for the catalog to be accepted. Reach out to supplier enablement (coupasupport@apog.com) to receive our template with required fields highlighted.
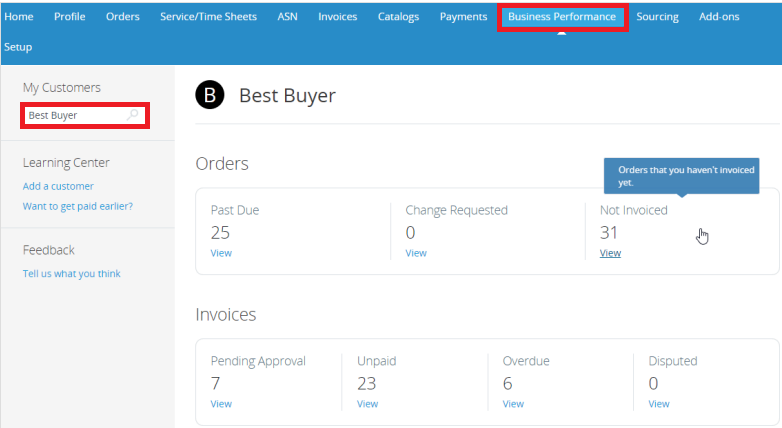
View Business Performance Data
Click on the "Business Performance" tab on the main menu to view a summary of orders and invoices that may need attention, and year-to-date order, invoice, and delivery time trends.
In the top left corner, select from the list or search for the customer for which you want to see performance data.
The selected customer name appears at the top of the page and below it, you can see a summary (with numbers and statuses) of your orders and invoices that need attention.